Saturday, May 5, 2012

Activating Hibernate in Windows 7

With Hibernate, you can save energy of your laptop. The difference between Sleep Mode and Hibernate is that  
Sleep Mode saves files and opened documents to memory while Hibernate saves opened documents to harddisk and cuts off the electric current. With Hibernate, you don't need to reboot your laptop to back to last edited document.


These are the steps:

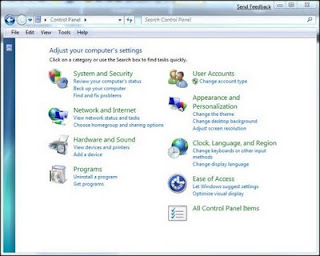
1.  Open Command Prompt through Administrator Privilege.
2.  Type "cmd" in Start Menu then press Ctrl + Shift + Enter
3.  Type the following instruction:  "powercfg /hibernate on"
     then press Enter.
4.  Type "exit" then press Enter to close Command Prompt.

Then You will see an option "Hibernate" in Start Menu. Good Luck !
       

Tuesday, January 17, 2012

The important commands of Windows 7

The command prompt that has been in previous versions of Windows is still with us and is not much changed from Windows Vista. The command line remains a powerful and much used feature by system administrators everywhere. Thus, the old command interpreter cmd.exe has been continued although in a slightly newer version. Several commands are now in the standard list that were formerly available only on servers. There are many commands but here are 10 very important commands you must know.

1. Driverquery

Incorrect device drivers can lead to any number of system problems. If you want to see which drivers are installed on a Windows 7 system, you can do so by running the driverquery tool. This simple command-line tool provides information about each driver that is being used. The command is:
driverquery

If you need a bit more information, you can append the -v switch. Another option is to append the -si switch, which causes the tool to display signature information for the drivers. Here’s how they look:

driverquery -v
driverquery -si
2. Ping

Ping is probably the simplest of all diagnostic commands. It’s used to verify basic TCP/IP connectivity to a network host. To use it, simply enter the command, followed by the name or IP address of the host you want to test. For example:

ping 192.168.1.1

Keep in mind that this command will work only if Internet Control Message Protocol (ICMP) traffic is allowed to pass between the two machines. If at any point a firewall is blocking ICMP traffic, the ping will fail.

3. System File Checker

Malicious software will often attempt to replace core system files with modified versions in an effort to take control of the system. The System File Checker can be used to verify the integrity of the Windows system files. If any of the files are found to be missing or corrupt, they will be replaced. You can run the System File Checker by using this command:

sfc /scannow
4. File Signature Verification 

One way to verify the integrity of a system is to make sure that all the system files are digitally signed. You can accomplish this with the File Signature Verification tool. This tool is launched from the command line but uses a GUI interface. It will tell you which system files are signed and which aren’t. As a rule, all the system files should be digitally signed, although some hardware vendors don’t sign driver files. The command used to launch the File Signature Verification tool is:

sigverif
5. Nslookup

The nslookup tool can help you to verify that DNS name resolution is working correctly. When you run nslookup against a host name, the tool will show you how the name was resolved, as well as which DNS server was used during the lookup. This tool can be extremely helpful when troubleshooting problems related to legacy DNS records that still exist but that are no longer correct.

To use this tool, just enter the nslookup command, followed by the name of the host you want to resolve. For example:

nslookup dc1.contoso.com
6. Repair-bde

If a drive that is encrypted with BitLocker has problems, you can sometimes recover the data using a utility called repair-bde. To use this command, you will need a destination drive to which the recovered data can be written, as well as your BitLocker recovery key or recovery password. The basic syntax for this command is:

repair-bde   -rk | rp 

You must specify the source drive, the destination drive, and either the rk (recovery key) or the rp (recovery password) switch, along with the path to the recovery key or the recovery password. Here are two examples of how to use this utility:

repair-bde c: d: -rk e:\recovery.bek
repair-bde c: d: -rp 111111-111111-111111-111111-111111-111111
7. Taskkill

The taskkill command terminates a task, either by name (which is referred to as the image name) or by process ID. The syntax for this command is simple. You must follow the taskkill command with -pid (process ID) or -im (image name) and the name or process ID of the task that you want to terminate. Here are two examples of how this command works:

taskkill -pid 4104
taskkill -im iexplore.exe
8. Pathping

Ping does a good job of telling you whether two machines can communicate with one another over TCP/IP, but if a ping does fail, you won’t receive any information regarding the nature of the failure. This is where the pathping utility comes in.

Pathping is designed for environments in which one or more routers exist between hosts. It sends a series of packets to each router that’s in the path to the destination host in an effort to determine whether the router is performing slowly or dropping packets. At its simplest, the syntax for pathping is identical to that of the ping command (although there are some optional switches you can use). The command looks like this:

pathping 192.168.1.1
9. Ipconfig

The ipconfig command is used to view or modify a computer’s IP addresses. For example, if you wanted to view a Windows 7 system’s full IP configuration, you could use the following command:

ipconfig /all

Assuming that the system has acquired its IP address from a DHCP server, you can use the ipconfig command to release and then renew the IP address. Doing so involves using the following commands:

ipconfig /release
ipconfig /renew

Another handy thing you can do with ipconfig is flush the DNS resolver cache. This can be helpful when a system is resolving DNS addresses incorrectly. You can flush the DNS cache by using this command:

ipconfig /flushdns
10. Tasklist

The tasklist command is designed to provide information about the tasks that are running on a Windows 7 system. At its most basic, you can enter the following command:

tasklist

The tasklist command has numerous optional switches, but there are a couple I want to mention. One is the -m switch, which causes tasklist to display all the DLL modules associated with a task. The other is the -svc switch, which lists the services that support each task. Here’s how they look:

tasklist -m
tasklist -svc

Sunday, January 1, 2012

Blocking An Account Automatically

There are many ways for a crackers to break your account, such as a brute force method. In this method , a cracker tries to combine characters, letter and numbers to break your user account, or guessing various words in dictionary, or breaking your account directly through the weakness of system.
In Windows 7, There is a way to reduce an account breaking by locking the account. A locking is done automatically after user gives incorrect password for several times.
These are the steps to activate this feature:
1. Start_then type "secpol.msc" in Searching box
2. Local Security Policy Editor will be opened, go to Account Policies and choose Account Lockout Policy
3. Right click Account lockout thereshold and choose properties
4. Add amount of "invalid logon" from default 0 to higher number. If you enter "3" then the user account will be blocked after the user give a wrong password 3 times
5. OK to save change

Tuesday, July 19, 2011

Know Better The Windows 7 System Recovery Options

There are actually several ways that you can get to the System Recovery Options, and the method you choose will depend on your situation.

  • If your system will still attempt to start Windows, then you can attempt to access the System Recovery Options from your hard disk.
  • If Windows won’t start at all, you can access the System Recovery Options by booting from the Windows 7 DVD.
  • If you have created a System Repair Disc, you can boot from that disk as well and access the System Recovery Options. (I’ll cover the creation of a System Repair Disc next time.)

For example, let’s suppose that your system will still attempt to start Windows, but it fails to complete the boot-up process. To access System Recovery, you will need to first power down the system and then turn it back on. After the system boots up and as soon as you hear the beep that signals the beginning of the Windows boot, press and hold the [F8] key.

When you see the Advance Boot Options screen, select the Repair Your Computer option. As you can see from the description at the bottom of the screen, selecting this option will display a list of system recovery tools that you can use to repair startup problems, run diagnostics, or restore your system. To continue, just press [Enter].

When you do, you’ll see a screen that tells you that Windows is loading files. Then you’ll see a boot screen with a green animated progress bar. After a few moments, you’ll be prompted to choose a keyboard input method,. To continue, click the Next button.

You’ll then see the logon screen. You should log on with an account that has administrative privileges. When you do, you will see the System Recovery Options menu.

As you can see, there are five options on the System Recovery Options menu. Let’s take a closer look.

  • Startup Repair: This should be your first choice if it did not run automatically when a boot problem was encountered. Keep in mind that Startup Repair is designed to fix only certain problems, such as missing or damaged system files. It is not designed to fix problems caused by hardware failures, such as a failing hard disk.
  • System Restore: As you know, this tool is designed to restore Windows system files to an earlier point in time without affecting your data files, such as email, documents, or photos, in any way. To accomplish this feat, System Restore continuously monitors your system, looking for significant changes to the operating system, such as an application or driver installation or an operating system update procedure, and will automatically create a Restore Point when it senses such an impending change. Restore Points are essentially snapshots of your system state, which include crucial system files and certain parts of the registry. System Restore maintains multiple restore points, which gives you the choice of restoring your computer to any number of previously saved states. As such, running System Restore and choosing a recent restore point is a good way to recover from an unbootable system.
  • System Image Recovery: If for some reason System Restore is unable to do its job and you have recently created a system image of your hard disk, you can use the System Image Recovery option to revive an unbootable system. A system image includes the operating system and all your system settings, your programs, and all your files. Keep in mind that when you restore your computer from a system image, it will actually perform a complete restoration of your entire system, which means that all your current programs, system settings, and files will be replaced with the versions that were current when you made the system image.
  • Windows Memory Diagnostic: If in addition to having problems starting Windows, you’ve been encountering application failures, operating system faults, or Stop errors, you can use the Windows Memory Diagnostic Tool to test the RAM chips in your system and investigate the possibility of defective or failing RAM. Essentially, the Windows Memory Diagnostics Tool performs its test by repeatedly writing values to memory and then reading those values from memory in order to verify that the data has not changed.
  • Command Prompt: When you select the Command Prompt option, you’ll be able to run a specific set of command-line tools that you can use to perform recovery operations as well as other types of diagnostics.


Monday, April 11, 2011

Few Tricks for Windows 7


Still, as good as Windows 7 is, it’s not perfect out of the box. Here are a few tweaks and tricks you can use to make this excellent OS even better.
1. Get Quick Launch
Once you have the Quick Launch bar on your taskbar, you can drag programs to it as you did in Vista. See my Quick Launch bar in Figure A, on the right side of the taskbar next to the notification area.

Figure A

2. Bring back the Vista taskbar look and behavior
Even though I like the new taskbar, I know some people don’t. They’d prefer to have the old Vista/XP look and behavior, where the taskbar uses less screen space. If you’re in that camp, it’s easy to change the taskbar so it will be similar to the old look:
  1. Right-click the Start button and select Properties.
  2. Click the Taskbar tab.
  3. Select the Use Small Icons check box and click Apply.

If you don’t like the way Windows 7 combines icons for all instances of an application, you can change that, too. On the same tab, click the down arrow on the Taskbar Buttons box and select Combine When Taskbar Is Full.

This dialog box also allows you to select the taskbar location on the screen (bottom, top, left, or right), customize which icons appear in the notification area (system tray), and decide whether to temporarily minimize all open windows when you place your mouse on the far end (or bottom) of the taskbar (Desktop Preview).

3. Put different wallpapers on multiple monitors

If you’re using Windows 7 with two or more monitors, you’ll be pleased to find that multi-monitor support has been improved. One thing I really like about Windows 7 is that when I connect to it via Remote Desktop from another computer, it doesn’t rearrange all my icons as Vista often did with multiple monitors. However, one thing Microsoft didn’t build into Win 7 that some of us were hoping for is the ability to set different wallpapers on different monitors.

In XP and Vista, I used UltraMon to do that, but it costs $40. In a tough economy, many people don’t want to spend that much for a program of that kind. Besides, based on what I read in the forums, it doesn’t yet work reliably on Windows 7. Luckily, I was able to hunt down another application called DisplayFusion. The free version gives you multiple wallpaper support, and the paid version, which costs $20 less than UltraMon, gives you multiple taskbars and window management features. I’ve installed it on two Windows 7 computers and it works great. As you can see in Figure B, you can configure a variety of settings.

Figure B

4. Turn off Aero Snap

A new feature in Windows 7 is Aero Snap, which causes your application windows to automatically snap into a preconfigured place when you move them to the edges of the screen. Drag a window to the far right, and it will size itself to fill exactly half the screen. Drag it to the top corner and it will maximize to fill the whole screen. This can be handy, but it can also be annoying if you prefer that your windows stay the size you made them. Luckily, you can easily turn Snap off. Here’s how:

  1. Click Start and select Control Panel.
  2. Click Ease of Access Center.
  3. Click Make the Mouse Easier to Use.
  4. Select the Prevent Windows From Being Automatically Arranged When Moved To The Edge Of The Screen check box and click OK.
5. Display Control Panel applets with small icons
By default, the Windows 7 Control Panel shows the Category view (Figure C), similar to the default in Windows Vista.
Figure C

The default Control Panel view in Windows 7 is Category.
You can easily change to a more classic view by clicking All Control Panel Items at the bottom of the categories list, but that gives you a list of the items represented by large icons, as shown in Figure D.
Figure D

Clicking All Control Panel Items gives you a view of the applets with large icons.
What if you’d like to display the items with small icons so more of them will fit in the same space? Your first thought might be to click the View menu on the taskbar, but at least in the public beta (build 7000), the icon size choices are all grayed out. However, there’s a little trick: Right-click on an empty space in the window, and you’ll get a context menu from which you can pick View Small Icons. Selecting this command will allow you to display many more items in the same size window.

6. Format the text in sticky notes
Another new feature in Windows 7 is the built-in Sticky Notes application. You’ll find it on the Start menu. You’ve probably already discovered that you can change the color of notes by right-clicking and selecting a new color. You may also have figured out that you can use the Ctrl + B and Ctrl + I shortcuts to format the text as bold or italic. But did you know that you can make bulleted and numbered lists in your sticky notes, and increase or decrease the text size? Here are some more handy keyboard shortcuts that work within sticky notes:

  • Ctrl + Shift + L (once): Bulleted list
  • Ctrl + Shift + L (twice): Numbered list
  • Ctrl + Shift + >: Increase text size
  • Ctrl + Shift + <: Decrease text size
  • Ctrl + U: Underline
  • Ctrl + T: Strikethrough
7. Turn off Windows features
Microsoft gives you much more flexibility with Windows 7, allowing you to turn off Windows components — such as Internet Explorer, Windows Search, the Gadget platform, and media features — that you couldn’t disable in earlier versions of Windows. Here’s how:

  1. Click Start | Control Panel and select Programs And Features.
  2. In the left pane, click Turn Windows Features On Or Off.
  3. Simply select or deselect the check boxes to enable or disable the various Windows features,
8. Make Adobe Reader display PDFs properly
If you’ve installed Adobe Reader in Windows 7, you may notice that sometimes when you try to open a PDF file, you get an error message and the file doesn’t open. It seems Adobe doesn’t play well with IE 8 in Windows 7 and won’t open the files (or at least won’t open some of them) in the browser.

If you set Adobe not to display PDFs in the browser, it will open them without any problems. Here’s how to configure that:

  1. Open Adobe Reader.
  2. Click Edit | Preferences.
  3. Click Internet in the left Categories pane.
  4. Under Web Browser Options, deselect the Display PDF In Browser check box and click OK.
9. Use the new keyboard shortcuts

If you’re a fast typist and hate having to move your hands from the keyboard to the mouse, you’ll be happy to know that Windows 7 provides new shortcut key combos to let you do more without mousing. Here are a few to try out:

  • Windows + E will open a new Explorer window.
  • In Windows Explorer, press Alt + P to turn the preview pane on.
  • Windows + P opens the Display Switcher applet.
  • Windows + Spacebar shows the desktop (makes active windows transparent).
  • Windows Logo Key + Plus (+) key turns on the Magnifier to zoom in on the desktop. Windows Logo key + Minus (-) key zooms back out.
  • Ctrl + clicking an icon in the taskbar toggles between the open instances of the program.
  • Windows Logo key + Left or Right Arrow key will shift the active window to the left or right side of the screen and make it fill half the screen (same as dragging the window to the left or right edge of the screen but without using the mouse).
  • Windows Logo key + Shift + Left or Right Arrow key (with multiple monitors) will move the window to the left or right monitor.
10. Install Windows 7 from a USB thumb drive

If you’re so impressed with Windows 7 on your desktop computer that you want to install it on your laptop, what do you do if the laptop is an ultra compact that doesn’t have a DVD drive? Of course, you could connect a USB DVD drive, if you have one. Or you could put the installation files on a network drive and connect to it over the network.

But here’s another option that works surprisingly well: Copy the contents of the Windows 7 ISO image to a 4 GB or larger USB thumb drive (or a flash memory card, if the laptop has a built-in reader). Installing the OS this way is likely to be faster than using a DVD.

Sunday, February 13, 2011

Modifying Windows 7 Boot Loader

In Windows 7, if you ever have two operating systems and now you have removed one of them, then in Windows 7 Boot Loader, one of removed operating system is still there. You're forced to make the selection advance. This is so annoying. Now these are little steps to remove it:
To begin, open the Start menu, select All Programs, and then choose Accessories. Right-click on Command Prompt and select Run As Administrator. Once in the command window, type bcdedit.This will return the current running configuration of your boot loader, showing any and all items that can boot on this system.
Select one of Windows Boot Loader that has no identifier {current}, it has rows of numbers and letters in identifier line.


Then type Bcdedit /delete {boot loader identifier} , braces included. That's all.
Warning: Don't you try to delete Windows Boot Manager ! you may render your computer unbootable. You may only delete Windows Boot Loader.