Friday, December 31, 2010

Deactivate "Your Computer Might be at Risk" popup in Windows XP SP2


Is this often bother you? 
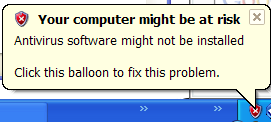
If your computer doesn't has antivirus software installed or out of dated antivirus, popup always shown at start up as default. Here are the tricks to disable it:
1. Go to Control Panel

2. Click Security Center icon

3. On the left side, you'll see a resources section, click link "Change the way Security Center Alerts Me" at the bottom.

4. You can choose which alert to disable here. Try them and see the differences

Activate Windows 7 GodMode

"GodMode" is one of Windows 7's facilitation that allows you to access windows setting so easily. It gives a single place to access all windows setting without browsing Control Panel.

1. Create a new folder

2. Rename it to GOD MODE.{ED7BA470-8E54-465E-825C-99712043E01C}, this code
number is important, but you can change "God Mode" text.

3. The folder icon will change and try to doubleclick it, you'll brought to God Mode window.

Monday, November 29, 2010

Scan Windows 7 system files to repair errors

First you will need to start a permission-elevated command-line prompt. Typecommand into the Desktop Search box and then right-click on the Command Prompt menu entry and select the Run as Administrator item (Figure A).

Figure A

After accepting the elevated permissions, at the prompt type this command:

sfc /scannow

Now the system will verify the system

files and repair any corrupted files (Figure B).

Figure B


My test system had no errors (Figure C); however if it did, this scan would have repaired any corrupted files, but without forcing a system reboot.

Figure C


Saturday, September 4, 2010

Most Useful Windows 7 Keyboard Shortcuts

Try these cool cheats, it will help you work more efficiently with Windows 7, these need combination with 'win' ( a button with windows flag).

1. Win + Home = Minimizes all but the current window

2. Win + Spacebar = Preview Desktop (makes all open windows transparent)

3. Win + Up Arrow or Down Arrow = Maximizes the current window or minimizes/restores the current window

4. Win + Left Arrow or Right Arrow = Tiles the window on the left side(or the right side) of the screen

5. Win + P = Chooses a Network Projector presentation display mode

6. Win + Alt + 1..0 = Accesses the Jump List of a program pinned on the Taskbar in the position indicated by the number

7. Win + T = Cycles through the items on the Taskbar

8. Win + 1..0 = Launches a program pinned on the Taskbar in the position indicated by the number; or accesses a running program on the Taskbar in the position indicated by the number

9. Win + Shift + 1..0 = Launches a new instance of a program pinned on the Taskbar in the position indicated by the number

10. Win + Ctrl + 1..0 = Accesses the last active instance of a program pinned on the Taskbar in the position indicated by the number


Sunday, June 27, 2010

Create your own icons in Paint

You can create Windows XP icons for your own in Paint. Here are the steps:

1. Click on Start-All Programs-Accessories menu.

2. Pull down the Image menu then select the Attributes command.

3. Type 32 in both the Width and Height boxes in the Attributes dialog box and click OK.

4. Choose the Magnifier tool and select the level 8 magnification setting in order to make the image easier to work with.

5. Press [Ctrl] and G togethet to add gridlines.

6. Use the tools and colors to create your icon.

7. Press [Ctrl] and S to save the file with an ICO extension.


Monday, May 31, 2010

Adding Virtual Drive on your computer

There's an utility for Windows XP that allows you to play ISO files. That is Virtual CD-ROM Control Panel V2.0.11. You can download it in http://www.softpedia.com/progDownload/Virtual-CDROM-Control-Panel-v-Download-16468.html. This supports Windows XP Professional and Windows XP Home Edition, then do the several ways:
1.
Extract the files to your %systemroot%system32\drivers folder and double-click the VcdControlTool.exe and
click Driver Control. Click the Install Driver button and navigate to the %systemroot%system32\drivers folder
and choose VcdRom.sys and click Open and Start and OK.
2.
Click Add drive in order to add a virtual drive letter. A virtual drive letter will appear.
3.
Choose Mount to mount your ISO image to the virtual drive letter. Now you can enjoy your Virtual
CD-ROM
4.
choose Eject |Remove Drive | Driver Control| Stop | Remove Driver | OK, when you want to stop playing
with Virtual CD-ROM.

Saturday, May 22, 2010

Making Your Network Places in Win XP Faster

Windows XP usually scans all remote computers for scheduled task. This can cause your computer network runs extremely slow. You can modify this configuration by editing Registry Editor.
1. Start - Run - then type : Regedit.exe (Open the Registry Editor)
2. Go to HKEY_LOCAL_MACHINE/Software/Microsoft/Windows/ Current Version/Explorer
/RemoteComputer/NameSpace.
3. Under the NameSpace branch, locate the subkey named {D6277990-4C6A-
11CF-8D87-00AA0060F5BF}.
4. To make a backup copy of this key, right-click the key, and select Export.
5. In the Export Registry File dialog box, select a folder, and give the file a
descriptive name.
6. Right-click the key, and select Delete.
7. Close the Registry Editor, and restart Windows XP for the change to take effect.

Before you do editing Regedit.exe, I recommend that you back up your registy file first.